You Like Translate - Any Language

About Me (Bpsjptforyou)

Friday, February 18, 2011

How to Take Better Product Photographs for Free

hai frds

How to Take Better Product Photographs for Free: "
Bad (top) and much better (bottom) product photography.
Need great product photographs for an eBay auction, your website, or maybe even putting in an article on wikiHow? It doesn't require a studio or expensive off-camera lighting, and certainly not calling in a professional photographer to do it for you. With a little thought put into your photography and post-processing, you can make your own great product photographs with things you already have. Here's how.

Steps


  1. Clean your product meticulously; every bit of dust you didn't know was there will become very obvious in  photographs.
    Clean your product meticulously; every bit of dust you didn't know was there will become very obvious in photographs.
    Clean the product meticulously. Grease shines and dust can sparkle; at high resolution, today's digital cameras can show every last speck and fingerprint. Soft light makes dirt stand out less, but the sharpness you want for everything else will show the dirt too.[1]
    • Use a soft, clean, low-lint cloth such as a cotton terry towel. Rubbing alcohol leaves no residue and is safe for most non-plastic modern surfaces (Rubbing Alcohol may damage plastics, and can cause clear plastic to become foggy), but very dilute soapy water is gentler to some. Spot test an inconspicuous area first if in doubt.

  2. Get outside. An overcast day is best. If it's a nice day, head for 'open shade': an area shaded from the sun but open to much of the sky. These areas are more plentiful in the morning and evening; at midday, you'd have to get under something. You want nice, soft, diffuse light; what you don't want is the sun directly facing into your setup.

    You can also work inside close to a big unshaded window which the sun isn't shining into directly. This is dimmer, so you'll need a longer exposure and the tripod later.
  3. A few sheets of paper will give you a nice plain white background.
    A few sheets of paper will give you a nice plain white background.
    Put a few sheets of plain white paper on a table (you'll need a few sheets with ordinary copy paper because a single sheet will not be entirely opaque), and put the product on it. Find a solid object to prop up the paper behind your subject; in the example photos, you can see a handy patio umbrella post sitting there.
  4. Put your camera on a tripod. This will permit you to use the smaller apertures (and consequent long shutter speeds) needed for product photography. If you don't have a tripod, stack up some random objects you have kicking around until you're at a good working height.
  5. Keep moving your camera and subject around until you're at the right angle and distance.
    Keep moving your camera and subject around until you're at the right angle and distance.
    Move around. Get your camera at the right angle to the product: a roughly corner-on isometric view.[2] or edge-on oblique view[3] gives a three-dimensional appearance generally more appealing than a face-on orthographic view[4] Get your camera at the right distance from the product, too: generally 'far enough' (and zoomed in) because a flat undistorted perspective is generally more useful than a perhaps-artistically distorted close-up one.[5] Products, like anything else, will look weird if you try to take photographs from too close to your subject.[1] If possible, try to get at least half a meter away.

    You might find that your zoom lens will only focus to closer distances at shorter focal lengths; make your own experiments here, because this may dictate your working distance.
  6. Get your camera's settings right.
    • Make sure your flash is turned off. Subjects lit by direct, on-camera flash look eBay-tastic,[6] with harsh untamed highlights in many places and harsh shadows in others.
    • Set your white balance. If you have a 'shade' or 'cloudy' setting, you want to use this. The sky, which lights the shade, is bluish-white. Otherwise, use the 'sun' setting. If you're a raw-shooting headbanger you don't have to bother with this, although it'll give your favourite raw conversion software a starting point.
    • Set your ISO as low as you can. For product photographs shot from a tripod you don't need the faster shutter speeds that higher ISOs permit, and lower ISOs means less noise (meaning smoother original pictures) and that less or no noise reduction needs to be applied (meaning sharper smooth pictures).
    • Set your camera to aperture priority mode. All digital SLRs and some compact cameras have it. If you're using a compact camera without an aperture-priority mode, you might want to try the 'macro' mode.

  7. The top photo was shot at f/4, the bottom one at f/11; note how much more obviously the shutter button is defocused in the former.
    The top photo was shot at f/4, the bottom one at f/11; note how much more obviously the shutter button is defocused in the former.
    Set an aperture, if you're using aperture priority mode. Product photography often requires small apertures (larger f/ numbers) for a lot of depth of field, but at some point the image (including the parts of it outside of the plane of perfect focus) will be softer because of diffraction effects.

    Your optimal aperture will depend on many factors (including your lens, your focal length, your working distance and even your sensor size), so experiment. Start at f/11 on a digital SLR or the smallest aperture on a compact camera, and try the neighbouring few apertures, and zoom in on your LCD when you play the images back. Use the aperture which seems the sharpest all over. If you have to choose between not having enough depth of field and having a slightly softer image due to diffraction, then choose the latter; diffraction is modest all over and relatively easy to correct in software to some degree, whereas defocus gets more severe as one moves away from the plane of focus and is a complex phenomenon that is close-to-impossible to correct.
  8. The bottom photo was deliberately overexposed (with exposure compensation) to bring the white background closer to white.
    The bottom photo was deliberately overexposed (with exposure compensation) to bring the white background closer to white.
    Get the exposure right. The white piece of paper will often confuse a camera's meter; the camera will see it as a bright thing that needs to be exposed to grey, rather than left white. Use your exposure compensation; a whole stop of over-exposure is a good place to start. Ideally, you want to keep the paper bright, but not overexpose it all the way to 255 white.
  9. Turn on the self-timer once you've got the exposure right. For the kind of exposure times you'll be using, and the act of pushing the shutter button can cause noticeable camera shake (especially on cheaper tripods). Turning on the self-timer will give that motion a little time to damp. If you have a selectable self-timer length, try setting it to 2 or 5 seconds.
  10. Take your shot and check your LCD again. If you're happy with the results, then go on to post-processing.
  11. The result straight from the camera. Looking promising, but needs some post-processing work.
    The result straight from the camera. Looking promising, but needs some post-processing work.
    Install GIMP. The GNU Image Manipulation Program is a piece of open source software that can be downloaded for free. It's not as sophisticated as Photoshop in every way, but it's free, and plenty good for simple post-processing jobs like you're going to do here.
  12. Start GIMP and open your image (File ->> Open).
  13. Bring the background back to white with the levels tool.
    • GIMP's levels dialog.
      GIMP's levels dialog.
      Go to Colors -> Levels, which will bring up the levels dialog. Click on the 'white point' eye-dropper (the rightmost of the three near the bottom right of the dialog).
    • Click on the "White point" eye dropper, then click on the darkest part of the background that should be white.
      Click on the 'White point' eye dropper, then click on the darkest part of the background that should be white.
      Click on the darkest part of the background which should be white, but isn't. Then hit 'OK'.
    • Doing this will make the white background white, as it should be.
      Doing this will make the white background white, as it should be.
      This will make your background pure white (at the cost of bringing out a little noise).

  14. Cropped, to remove as much of the background while leaving a little empty space around the subject.
    Cropped, to remove as much of the background while leaving a little empty space around the subject.
    Crop your photograph. You probably have a lot of unnecessary empty areas in your photo (and probably some of the background behind the white paper, too). Bring up GIMP's crop tool (Tools -> Transform Tools -> Crop, or press Shift+C), and click-and-drag a selection around the area to which you want to crop. Hit the Enter key when you're done to crop the photograph.
  15. Remove any marks and dust. This means dust and marks on your subject, and possibly marks on your white paper background as well. But clean your monitor first; anyone who's spent any time in a photo editor knows well the frustration of wondering why their clone tool isn't working, and it turning out to be dust on their screen!
    • Look for marks on the white background; these are easy to paint over.
      Look for marks on the white background; these are easy to paint over.
      Marks on the white background are obviously easy to correct; use the paintbrush or pencil tool with the foreground colour set to white.
    • Use the Clone tool (press C) or Heal tool (press H) to paint out dust on your subject. The Heal tool usually works better; experiment with this. With the tool active, select an area of similar or identical colour and texture, hold down Ctrl, and click somewhere in that area. Then click (and drag, if necessary) on the specks of dust.

  16. Fix any remaining colour problems. You might find that there's a yellow or blue cast to grey objects (especially after the earlier step to bring the background back to white; this has the effect of shifting the colour balance of the whole photograph away from the colour of the area you clicked on). There are two ways of fixing this:
    • Fixing an iffy colour balance with the Hue-Saturation tool.
      Fixing an iffy colour balance with the Hue-Saturation tool.
      The Hue-Saturation tool can often be used to very good effect. Go to Colors -> Hue-Saturation, and click the selector next to the colour (R, Y, M, B, etc) to which the photo is shifted, then turn down the 'Saturation' slider until it looks right (it can look weird if you turn the saturation down too far; playing with the 'Overlap' slider might help here). Hit 'OK'.
    • If that doesn't work, you might want to try the colour balance (Colors -> Color Balance) and play with the sliders until it looks right.

  17. The end result, after a bit of sharpening.
    The end result, after a bit of sharpening.
    Do any other post-processing you like. For example, if you've shot at a very small aperture, your photo will almost certainly benefit from a little sharpening to make up for the softening caused by diffraction (Filters -> Enhance -> Unsharp Mask, use a radius of about 1 and 'Amount' set to somewhere between 0.5 and 1).

Video


Tips


  • If you're selling a high-value used item online, make a pretty picture to catch the buyer's attention with how good it will look in normal conditions, and make another with harsh point-source direct or raked lighting to fully disclose any damage.
  • If the product has any problems with glass, these problems are best shown with straight-on or oblique backlighting.

Warnings


  • Outside is hard and scratchy. Take care not to drop your camera or subject product.
  • Many modern products include plastics that may be damaged by harsh cleaners or rubbing alcohol. Take care when cleaning to use the least harsh cleaner necessary to get the product clean. Often, a water dampened cloth can get most products clean enough to photograph, especially consumer electronics.

Things You'll Need


  • Any digital camera is fine; this ancient, beaten-up 4 megapixel SLR< took the photographs for this article.
    Any digital camera is fine; this ancient, beaten-up 4 megapixel SLR< took the photographs for this article.
    A digital camera. Almost any camera will be good enough, especially if you're only doing low-resolution photographs for the web
  • Cleaning supplies such as a cotton terry towel and rubbing alcohol (caution: flammable)
  • A few sheets of plain white paper
  • A tripod, ideally

Related wikiHows


Sources and Citations


Article Tools

"

How to Replace Bicycle Trailer Bearings

hai frds

How to Replace Bicycle Trailer Bearings: "
Typical commodity bicycle trailer
While top-end bicycle trailers like those made by Bob and Burley have replacement parts available, the commodity trailers from the local discount store, on the other hand, are almost impossible to find information on, let alone buy replacement axles or wheels for. Here's how to demystify and overhaul a common design of bicycle trailer wheel.

Steps


  1. Remove the hitch pin from the 1/2 inch (12.7mm) axle bolt.
  2. Remove the wheel from the trailer.
  3. Setting the retaining ring pliers to 'external', remove the snap ring.
  4. Using a mallet or other heavy tool, tap out the axle bolt. If wheel is asymmetrical, note carefully which side the bolt head goes into. On this trailer, the bolt head goes on the flatter side of the wheel.
  5. Remove washers and set them aside where they won't get lost.
  6. Pry or push out the old bearing. See 'Tips' for ideas on how to go about doing this.
  7. Clean any goop out of the wheel using a small screwdriver, solvents, rags, or whatever you have.
  8. Repeat the previous two steps on the other side, assuming there are bearing assemblies on each side of the wheel.
  9. An example cost: $4.40 each from Maselli and Sons Hardware in Petaluma, CA, US, Feb. 2011.
    An example cost: $4.40 each from Maselli and Sons Hardware in Petaluma, CA, US, Feb. 2011.
    Buy new bearings. This model uses US standard 1/2' (12.7mm) ID, 1-1/8' (28.5mm) OD radial bearing assemblies.
  10. Insert the new bearings into each side of the wheel. If you have a socket the same size as the outer diameter of the bearing, and a mallet, then position the socket onto the bearing and tap firmly with the mallet until it's seated. Otherwise use whatever you have.
  11. The head of the bolt goes into the "flat" side of the wheel. The hole for the hitch pin goes on the side with the spokes jutting out, the side closest to the body of the trailer.
    The head of the bolt goes into the 'flat' side of the wheel. The hole for the hitch pin goes on the side with the spokes jutting out, the side closest to the body of the trailer.
    Reinsert the axle bolt into the wheel assembly.
  12. Replace the washers in the same order they were removed.
  13. Seat the snap ring. You may need to push it firmly onto the shaft using a screwdriver or other tool until it snaps into the groove.
  14. Lubricate it. Adding some lubricant will save you from having to do this again soon.
  15. Put the wheel assembly back into the trailer.
  16. Secure the axle with its hitch pin.

Tips


  • Two ways of forcing out the old bearing:
    • Drive it out from the opposite side using an old screwdriver and a mallet, hammer, or other heavy tool. The bearing ID should be slightly less than that of the wheel itself, giving you a small ledge you can catch with the edge of your tool.
    • Pry it out, tapping a small screwdriver or old wood chisel you don't care about ruining, under the edge all the way around, prying up or down until it comes out.

  • If the wheel binds, it is most likely because one or both bearings did not get seated properly. Take it apart again, if necessary, and tap around the edges of each bearing assembly to make sure it is evenly seated.
  • Use a piece of wood between the bolt and and tool used to hit it so the thread on the bolt won't be damaged.

Things You'll Need


  • Hand tools; particularly, external snap (retaining) ring pliers

Related wikiHows


Sources and Citations


Article Tools

"

How to Make a Chinese Paper Lantern


hai frds
How to Make a Chinese Paper Lantern: "
On the fifteenth day of the first month of the Chinese calendar (the last day of the Chinese New Year), the Lantern Festival is celebrated, and it's a time to decorate with lanterns of all kinds. Kids and adults of all ages can also celebrate this holiday by creating paper lanterns and placing them around the house.

Steps


  1. Assemble your supplies. These are listed below under 'Things You'll Need'.
  2. Measure out an inch (2.54cm) across the width of the paper. Cut off the top and set it on the side for later. This will be the lantern's handle.
  3. Fold the paper lengthwise (a hot dog fold).
  4. Measure out an inch (2.54cm) from the top of the fold. This will be the 'stop cut' line.
  5. Make one inch (2.54cm) interval lines across the paper and cut along the lines. Stop at the top line.
  6. Carefully fold the paper the other way. Making this fold will help you hide any pencil marks.
  7. Use a small piece of clear tape to connect the two paper ends together. Repeat on the other side.
  8. Staple on the handle.
  9. Hang up your paper lantern somewhere in the house. Make several lanterns to decorate fully.

Video


Tips


  • Adults may want to prepare the craft by measuring out lines and have kids cut the paper, with supervision.

Things You'll Need


  • Construction paper, one for each lantern
  • Scissors
  • Clear tape
  • Pencil
  • Ruler
  • Stapler

Related wikiHows


Sources and Citations


Article Tools

"

Comic for February 17, 2011

hai frds

Comic for February 17, 2011: "

"

Calvin and Hobbes for February 17, 2011

hai frds

Calvin and Hobbes for February 17, 2011: ""

Cheeni Kum Hindi Movie

hai frds

Cheeni Kum Hindi Movie: "Watch Movie Online:Server 1:click here
Server 2:
Part 1 Part 2 Part 3 Part 4Server 3:click hereServer 4:Part 1 : Part 2 : Part 3 : Part 4 :Part 5
Download :Part 1 Part 2 Part 3 Part 4
Starring: Amitabh Bachan, Tabu(cheenikum,cheenikam,cheeny,chiny,Chini Kam,hindi)

Jai Bolo Telangana – Telugu Movie

hai frds

Jai Bolo Telangana – Telugu Movie: "Watch Movie Online :
Server 1:
click here
Server 2:
click here
Starring: Jagapathi Babu

Cheeni Kum Hindi Movie

hai frds

Cheeni Kum Hindi Movie: "Watch Movie Online:Server 1:click here
Server 2:
Part 1 Part 2 Part 3 Part 4Server 3:click hereServer 4:Part 1 : Part 2 : Part 3 : Part 4 :Part 5
Download :Part 1 Part 2 Part 3 Part 4
Starring: Amitabh Bachan, Tabu(cheenikum,cheenikam,cheeny,chiny,Chini Kam,hindi)

Tuesday, February 15, 2011

5 Secrets to a Happy Marriage

hai frds

5 Secrets to a Happy Marriage: "
Written by Paula Szuchman
This Valentine’s Day, skip the chocolate, lingerie and jewelry. Instead, practice talking less, doing the dishes and putting out. Romantic? Maybe not. The secret to a life of wedded bliss? Quite possibly.
A little background. I just co-wrote a book called “Spousonomics: Using Economics to Master Love, Marriage & Dirty Dishes,” in which I take some well-established ideas from the dismal science and use them to show couples how they can improve their marriages. One of the first things people say when they hear about the book is something to the effect of, “Isn’t that kind of unromantic?” Well, yeah. But what’s romantic about dishes, laundry, diapers, bills, mortgages, in-laws, TiVo, company picnics, circular arguments, BlackBerries, hamsters, PTA meetings, and all the million other little things that go into a marriage and detract from the actual romance between two people who once loved each other so much they decided to keep each other company for the rest of their lives?
All that stuff is the business side of marriage, and to navigate it successfully, you don’t need chocolate hearts. You need sound reasoning. You need to be practical and efficient. You need to allocate your scarce resources wisely and make smart trade-offs, so that at the end of the day, you can enjoy the company of that person you promised to have and to hold until death (death!) do you part.
Herewith, five somewhat regressive, not very romantic, yet extremely effective lessons from economics for a happy marriage with long-term prospects:

1. Talk less.

Well okay, talk all you want about your dreams, ambitions and Egypt’s future. But when it comes to nagging reminders about what your spouse still has to do after a long day working for the man—take out the recycling, walk the dog, write a thank-you letter, defrost the chicken, fix the stereo—keep a lid on it. Economists talk about “information processing costs,” or the costs incurred from processing, absorbing and filtering information. When information processing costs get too high, we tend to become paralyzed. Like when we get to the kitchen-cabinet department at IKEA, and we’re so overwhelmed that we decide to skip the whole thing and just have a plate of meatballs at the café then head home for a nap.
Overloading your spouse with what you consider to be perfectly valid information is a bad idea. One thing at a time, friends, and the most important thing first. Same rule applies when you’re arguing. Stick to the point—he didn’t call to say he was running late—and don’t tick off the long list of sins he’s committed since last Tuesday.

2. Lose weight.

Married people exercise less than single people do. I know this because married couples have told me so—56% of people we surveyed said they gained weight after they got married. Everyone has their excuses: They’re too busy with their demanding jobs, too exhausted by their demanding children, too lazy to get off their demanding couches. But the real reason is moral hazard, or the tendency to take more risks and behave more irresponsibly when there are no consequences. Moral hazard is one reason the country’s biggest financial firms bet the house on subprime mortgages—they knew if worse came to worst, Uncle Sam would be there to bail them out.
Similarly, why bother working out and staying fit when you’ve already snagged your man—or woman—and you’ve got a license from the state to prove it? After I got married, one of my single friends told me I was lucky because I didn’t have to go to the gym anymore. I was no longer “posin’ to be chosen.”
So go ahead, challenge your own moral hazard and try losing that post-marriage weight. While you’re at it, don’t wear sweatpants around the house all the time.

3. Do the dishes.

Here’s where I’m really going to get skewered by my sisters for setting women back 50 years: Do the dishes because you just might be better at them, and faster, and less likely than your spouse is to leave them out overnight. You might think a 50/50 marriage is the way to go, but if you’re like so many other couples in the year 2011, your quest for egalitarianism means you’re more likely to pick a fight when you sense things are getting into the 60/40 range—or worse.
Better to have a system where each of you specializes in what you do best, relative to other chores. It’s a system based on the notion of comparative advantage, which (as every Wall Street Journal reader knows) is the foundation of free trade. And what’s marriage, if not a union between two trading partners? So if you really are better at the dishes than remembering to call the in-laws, then that should be your job. It’ll take you less time than it’ll take him, and it’ll take him less time to have a quick chat with mom than it would take you, which means in the end, you’ve saved quite a bit of collective time. Use that time for fun stuff, like, for example, sex.

4. Put out

Which brings me to my fourth point: Put out. I know, it seem ridiculous to tell married people they should have sex (with each other)—but then why do so many people seem to forget this is a key part of the job of being married? Some 54% of married people, according to our research, wish they were having more sex, and the people who are doing it more also report being happier in their relationships. Not saying one causes the other, but there’s a definite correlation, for what it’s worth. The #1 reason people say they don’t do it more: They’re too tired.
The only solution to this problem is to wake up and do the job—the same way you wake up every morning and go to your actual job. No reason why you can do one and not the other. In “Spousonomics,” we suggest people lower the costs of having sex in order to up demand. Keep it simple, fast and fun. Some people even say the more they get in the habit of doing it, the more they want to do it. Kind of like flossing.

5. Scheme

And finally, start scheming, or thinking strategically. Being strategic might sound cold and calculating, but it’s something you probably already do with your spouse, whether you admit it or not. For example, if your friends invite you for a weekend away, no spouses, and you want to go, you naturally start thinking about how you can make this happen with minimal fuss, what you can offer your spouse in return, how to bring it up, when to bring it up, and what type of flowers to present as graft when you’re in the midst of bringing it up.
Thinking ahead, learning from past experience, putting yourself in your spouse’s shoes—these are all strategies straight from the game-theory playbook (game theory being the study of behavior in strategic situations). In fact, if you think like a game theorist, you’ll find that marriage is really just a two-person repeated game. In the game, each person is trying to achieve the best results possible, given the limitations that there’s another person involved. Think of that other person and you’re being strategic. You’re also being pretty romantic.

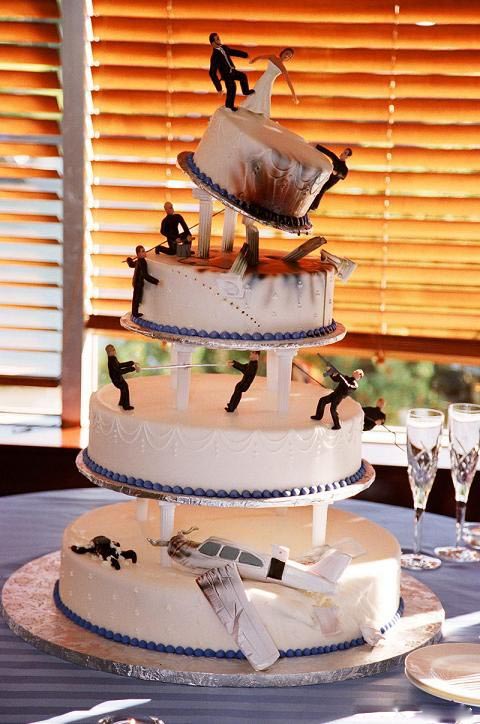
Bonus: Best Wedding Cake Ever!


Genelia LG Mobile Army Ad for Cricket World Cup 2011

hai frds

Genelia LG Mobile Army Ad for Cricket World Cup 2011: "
"

Tv9 - Lovely animals

hai frds

Tv9 - Lovely animals: "
"

30 Minutes - Drugs Mafia in Tollywood

hai frds

30 Minutes - Drugs Mafia in Tollywood: "

other parts watch here
"

Watch Vasthadu Naa Raju 2011 Movie Online

hai frds

Watch Vasthadu Naa Raju 2011 Movie Online: "

(Note :- This Movie Is Not Uploaded By Us, Please Contact Original Uploader for any copyright issue.)
"

Indian Films Celebrity Hot Actress at Events On Weekends

hai frds

Indian Films Celebrity Hot Actress at Events On Weekends: "

Click Here for more Photos
"

Comic for February 15, 2011

hai frds

Comic for February 15, 2011: "

"

Calvin and Hobbes for February 15, 2011

hai frds

Calvin and Hobbes for February 15, 2011: ""

Patiala House (2011) - Hindi Movie

hai frds

Patiala House (2011) - Hindi Movie: "Watch Movie Online :
Part 1 Part 2 Part 3 Part 4 Part 5 Part 6 Part 7 Part 8
Cast : Akshay Kumar, Anushka Sharma, Rishi Kapoor, Dimple Kapadia, Tinnu Anand, Prem Chopra, Lee Nicholas Harris, Jeneva Talwar, David Frost, Masood Akhtar, Hard Kaur, Armaan Kirmani, Soni Razdan, Ankush Khanna, Selina Hotwani